Nginx与PHP
一、初识lnmp
由于Nginx拥有超越Apache的性能,LAMP逐渐被LNMP架构所取代。接下来我来谈一谈Nginx与PHP(FastCGI)的安装、配置与优化。FastCGI是语言无关的,可伸缩架构的CGI开放扩展,其主要行为是让CGI解释器进程保持在内存中并因此获得较高的性能。因为,CGI解释器的反复加载时CGI性能低下的主要原因。如果CGI解释器保持在内存中并接受FastCGI进程管理调度,则可以提供良好的性能,伸缩性等。
其工作原理:
- FastCGI进程管理器自身初始化,启动多个CGI解释器并等待WEB SERVER的连接。PHP-FPM进程管理器启动多个php-cgi进程。启动php-cgi进程时,可以配置以TCP和UNIX套接字两种方式启动。
- 当客户端请求到达WEB服务器(Nginx)时,服务器讲请求采用TCP或UNIX套接字方式转发到FastCGI主进程,主进程选择并连接到一个CGI解释器(子进程)。服务器把CGI环境变量和标准输入发送到FastCGI子进程php-cgi。
- FastCGI子进程完成处理后将标准输出和错误信息从同一连接返回给服务器。当FastCGI子进程关闭连接时,请求便告知处理完成。FastCGI子进程接着等待并处理来自FastCGI进程管理器的下一个连接。而一般的普通CGI模式中,php-cgi在此便退出了。
PHP FastCGI的优点:
- PHP脚本运行速度更快。Php解释程序被载入内存而不用每次需要时从存储器读取,大大提高性能。
- 需要使用的系统资源更少。由于服务器不用再每次需要时都载入PHP解释程序,不必担心增加CPU负担。
- 不需要对现有代码做任何改变。运行在LAMP的代码无须修改即可使用。
二、搭建LNMP
一、安装MySQL我们平时安装MySQL都是源码包安装的,但是由于它的编译需要很长的时间,我们这里选择安装二进制免编译包。你可以到MySQL官方网站去下载 http://dev.mysql.com/downloads/ 具体版本根据你的平台和需求而定,目前比较常用的为mysql-5.0/mysql-5.1, 5.5版本虽然已经发布有段日子了,但是貌似用在线上跑服务的还是少数。
具体的步骤如下:
1、下载mysql安装文件到/usr/local/src 目录下
| 1 | [root@yong ~]# cd /usr/local/src |
| 1
2 |
[root@yong src]# wget http://syslab.comsenz.com/downloads/linux/mysql-5.1.40-linux-i686-icc-glibc23.tar.gz
--2015-04-27 09:23:01-- http://syslab.comsenz.com/downloads/linux/mysql-5.1.40-linux-i686-icc-glibc23.tar.gzResolving syslab.comsenz.com... 101.227.130.115Connecting to syslab.comsenz.com|101.227.130.115|:80... connected.HTTP request sent, awaiting response... 200 OKLength: 123633020 (118M) [application/octet-stream]Saving to: “mysql-5.1.40-linux-i686-icc-glibc23.tar.gz” |
| 1 | [root@yong src]# tar -zxvf mysql-5.1.40-linux-i686-icc-glibc23.tar.gz |
提醒注意:不用自己手动添加/mysql目录,移动的同时会把原目录改名的。
| 1 | [root@yong src]# mv mysql-5.1.40-linux-i686-icc-glibc23 /usr/local/mysql |
| 1 | [root@yong src]# useradd -s /sbin/nologin mysql |
| 1
2 3 4 5 6 7 8 |
[root@yong src]# cd /usr/local/mysql/
[root@yong mysql]# mkdir -p /data/mysql [root@yong mysql]# chown -R mysql:mysql /data/mysql/ [root@yong mysql]# ./scripts/mysql_install_db --user=mysql --datadir=/data/mysql/ Installing MySQL system tables... OK Filling help tables... OK |
6、拷贝配置文件
| 1 | [root@yong mysql]# cp support-files/my-large.cnf /etc/my.cnf |
根据内存大小选择:
my-small.cnf (内存 <= 64M)
my-medium.cnf (内存 128M )
my-large.cnf (内存 512M)
my-huge.cnf (内存 1G-2G)
my-innodb-heavy-4G.cnf (内存 4GB)
7、拷贝启动脚本文件并修改属性
| 1
2 |
[root@yong mysql]# cp support-files/mysql.server /etc/init.d/mysqld
[root@yong mysql]# chmod 755 /etc/init.d/mysqld |
| 1 | [root@yong mysql]# vim /etc/init.d/mysqld |
”datadir=/data/mysql“ (前面初始化数据库定义的目录)
9、把启动脚本加入系统服务项,并设定开机启动,启动mysql服务;
| 1
2 3 4 |
[root@yong mysql]# chkconfig --add mysqld
[root@yong mysql]# chkconfig mysqld on [root@yong mysql]# service mysqld start Starting MySQL.. [ OK ] |
| 1
2 3 |
[root@localhost mysql]# ps aux |grep mysqld
root 1341 0.0 0.1 6680 1328 pts/0 S 20:22 0:00 /bin/sh /usr/local/mysql/bin/mysqld_safe --datadir=/data/mysql --pid-file=/data/mysql/localhost.localdomain.pid mysql 1456 0.3 4.2 381608 43504 pts/0 Sl 20:22 0:01 /usr/local/mysql/bin/mysqld --basedir=/usr/local/mysql --datadir=/data/mysql --user=mysql --log-error=/data/mysql/localhost.localdomain.err --pid-file=/data/mysql/localhost.localdomain.pid --socket=/tmp/mysql.sock --port=3306 |
二、安装php
1、下载php5.4.37压缩包到/usr/local/src目录下;解压缩包,然后进入解压之后的目录;
| 1
2 3 |
[root@localhost src]# wget http://cn2.php.net/distributions/php-5.4.37.tar.bz2
[root@localhost src]# tar -jxvf php-5.4.37.tar.bz2 [root@localhost src]# cd php-5.4.37 |
| 1 | [root@localhost php-5.4.37]# useradd -s /sbin/nologin php-fpm |
| 1 | [root@localhost php-5.4.37]#./configure --prefix=/usr/local/php --with-config-file-path=/usr/local/php/etc --enable-fpm --with-fpm-user=php-fpm --with-fpm-group=php-fpm --with-mysql=/usr/local/mysql --with-mysql-sock=/tmp/mysql.sock --with-libxml-dir --with-gd --with-jpeg-dir --with-png-dir --with-freetype-dir --with-iconv-dir --with-zlib-dir --with-mcrypt --enable-soap --enable-gd-native-ttf --enable-ftp --enable-mbstring --enable-exif --disable-ipv6 --with-curl |
配置遇到的各项错误,根据错误提示进行安装所需要的包;
提示错误,没有可接受的C编译器,安装gcc包;
checking for cc... no
checking for gcc... no
configure: error: in `/usr/local/src/php-5.4.37':
configure: error: no acceptable C compiler found in $PATH
| 1 | [root@localhost php-5.4.37]# yum install -y gcc |
configure: error: xml2-config not found. Please check your libxml2 installation
| 1 | [root@localhost php-5.4.37]# yum install -y libxml2-devel |
checking for cURL in default path... not found
configure: error: Please reinstall the libcurl distribution -
easy.h should be in <curl-dir>/include/curl/
| 1 | [root@localhost php-5.4.37]# yum install -y libcurl-devel |
configure: error: jpeglib.h not found.
| 1 | [root@localhost php-5.4.37]# yum install -y libjpeg-devel |
configure: error: png.h not found.
| 1 | [root@localhost php-5.4.37]# yum install -y libpng-devel |
configure: error: freetype-config not found.
| 1 | [root@localhost php-5.4.37]# yum install -y freetype-devel |
configure: error: mcrypt.h not found. Please reinstall libmcrypt.
| 1
2 |
[root@localhost php-5.4.37]# yum install -y epel-release
[root@localhost php-5.4.37]# yum install -y libmcrypt-devel |
![]()
4、安装php,安装完成后使用echo $?查看是否安装正确;
| 1
2 3 |
[root@localhost php-5.4.37]# make && make install
[root@localhost php-5.4.37]# echo $? 0 |
| 1 | [root@localhost php-5.4.37]# cp php.ini-production /usr/local/php/etc/php.ini |
| 1
2 |
[root@localhost php-5.4.37]# cp /usr/local/src/php-5.4.37/sapi/fpm/init.d.php-fpm /etc/init.d/php-fpm
[root@localhost php-5.4.37]# mv /usr/local/php/etc/php-fpm.conf.default /usr/local/php/etc/php-fpm.conf |
mv -v /usr/local/php/etc/{php-fpm.conf.default,php-fpm.conf}
7、更改php-fpm的权限为755;添加php-fpm到系统启动项,并设置开机启动;启动php-fpm;
| 1
2 3 4 5 |
[root@localhost php-5.4.37]# chmod 755 /etc/init.d/php-fpm
[root@localhost php-5.4.37]# chkconfig --add php-fpm [root@localhost php-5.4.37]# service php-fpm start Starting php-fpm done [root@localhost php-5.4.37]# chkconfig php-fpm on |
三、安装nginx
1、下载nginx1.6.2压缩包到/usr/local/src目录下,解压缩包,之后进入解压缩后的目录;
| 1
2 3 4 |
[root@localhost ~]# cd /usr/local/src/
[root@localhost src]# wget http://nginx.org/download/nginx-1.6.2.tar.gz [root@localhost src]# tar zxvf nginx-1.6.2.tar.gz [root@localhost src]# cd nginx-1.6.2 |
| 1 | [root@localhost nginx-1.6.2]# ./configure --prefix=/usr/local/nginx --with-pcre |
checking for PCRE library ... not found
checking for PCRE library in /usr/local/ ... not found
checking for PCRE library in /usr/include/pcre/ ... not found
checking for PCRE library in /usr/pkg/ ... not found
checking for PCRE library in /opt/local/ ... not found
./configure: error: the HTTP rewrite module requires the PCRE library.
You can either disable the module by using --without-http_rewrite_module
option, or install the PCRE library into the system, or build the PCRE library
statically from the source with nginx by using --with-pcre=<path> option.
| 1 | [root@localhost nginx-1.6.2]# yum install -y pcre-devel |
3、安装nginx,安装完成后echo $?查看是否安装正确;
| 1
2 3 |
[root@localhost nginx-1.6.2]# make && make install
[root@localhost nginx-1.6.2]# echo $? 0 |
| 1
2 3 4 |
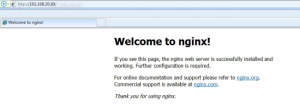
[root@localhost nginx-1.6.2]# /usr/local/nginx/sbin/nginx
[root@localhost ~]# ps aux |grep nginx root 986 0.0 0.0 3552 528 ? Ss 08:56 0:00 nginx: master process /usr/local/nginx/sbin/nginx -c /usr/local/nginx/conf/nginx.conf nobody 988 0.0 0.0 3752 884 ? S 08:56 0:00 nginx: worker process |
编写nginx启动脚本,加入##号内的内容;
| 1 | [root@localhost nginx-1.6.2]# vi /etc/init.d/nginx |
#!/bin/bash
chkconfig: - 30 21
description: http service.
Source Function Library
. /etc/init.d/functions
Nginx Settings
NGINX_SBIN="/usr/local/nginx/sbin/nginx" NGINX_CONF="/usr/local/nginx/conf/nginx.conf" NGINX_PID="/usr/local/nginx/logs/nginx.pid" RETVAL=0 prog="Nginx"
start() { echo -n $"Starting $prog: " mkdir -p /dev/shm/nginx_temp daemon $NGINX_SBIN -c $NGINX_CONF RETVAL=$? echo return $RETVAL }
stop() { echo -n $"Stopping $prog: " killproc -p $NGINX_PID $NGINX_SBIN -TERM rm -rf /dev/shm/nginx_temp RETVAL=$? echo return $RETVAL }
reload(){ echo -n $"Reloading $prog: " killproc -p $NGINX_PID $NGINX_SBIN -HUP RETVAL=$? echo return $RETVAL }
restart(){ stop start }
configtest(){ $NGINX_SBIN -c $NGINX_CONF -t return 0 }
case "$1" in start) start ;; stop) stop ;; reload) reload ;; restart) restart ;; configtest) configtest ;; *) echo $"Usage: $0 {start|stop|reload|restart|configtest}" RETVAL=1 esac exit $RETVAL
###########################################################################
5、设置nginx权限755,加入开机启动;
| 1
2 3 4 5 |
[root@localhost nginx-1.6.2]# chmod a+x /etc/init.d/nginx
[root@localhost nginx-1.6.2]# ls -l /etc/init.d/nginx -rwxr-xr-x. 1 root root 1211 5月 11 17:37 /etc/init.d/nginx [root@localhost nginx-1.6.2]# chkconfig --add nginx [root@localhost nginx-1.6.2]# chkconfig nginx on |
四、配置解析php
编辑nginx配置文件,找到下面的代码,删除前面的#号,更改 fastcgi_param这一行,加入nginx存放路径;

| 1
2 3 4 5 6 7 8 |
[root@localhost nginx-1.6.2]# vi /usr/local/nginx/conf/nginx
location ~ .php$ { root html; fastcgi_pass 127.0.0.1:9000; fastcgi_index index.php; fastcgi_param SCRIPT_FILENAME /usr/local/nginx/html$fastcgi_script_name; include fastcgi_params; } |
| 1 | [root@localhost nginx-1.6.2]# /usr/local/nginx/sbin/nginx -s reload |
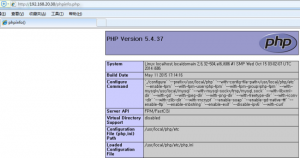
在nginx的目录下新建一个phpinfo.php文件,进行测试;
| 1
2 3 4 |
[root@localhost nginx-1.6.2]# vi /usr/local/nginx/html/phpinfo.php
<?php phpinfo(); ?> |
| 1
2 3 4 5 6 7 8 |
[root@localhost nginx-1.6.2]# curl localhost/phpinfo.php -I
HTTP/1.1 200 OK Server: nginx/1.6.2 Date: Mon, 11 May 2015 09:49:36 GMT Content-Type: text/html Connection: keep-alive X-Powered-By: PHP/5.4.37 |
三、配置开机自动启动Nginx+PHP
用vi编辑/etc/rc.local:在末尾增加以下内容:Ulimit -SHn 65535
/安装目录/php/sbin/php-fpm start
/安装目录/nginx/sbin/nginx
四、在不停Nginx服务的情况下平滑变更Nginx配置
- 在修改conf配置文件后,请执行命令检查配置文件是否正确:
- 输入命令查看Nginx的主进程号:
- 执行命令即可使修改过的nginx配置文件生效
五、设置每天定时切割Nginx日志
- 创建脚本
#!/bin/bash
#This script run at 00:10
The Nginx logs path
logs_path="/usr/local/nginx/logs/"
##递归建年目录,月目录
mkdir -p ${logs_path}$(date -d "yesterday" +"%Y")/$(date -d "yesterday" +"%m")/
mv ${logs_path}access.log ${logs_path}$(date -d "yesterday" +"%Y")/$(date -d "yesterday" +"%m")/access_$(date -d "yesterday" +"%Y%m%d").log
kill -USR1 cat /usr/local/nginx/nginx.pid
- 设置crontab,每天凌晨 00:00 切割Nginx访问日志
- 输入命令